Pages

Showing posts with label science. Show all posts

Monday, 29 March 2021

Making Salts

 AIM - To produce copper sulfate salt by reacting copper oxide with an acid. 

EQUIPMENT - Copper oxide powder, dilute (0.5 mol L-1) Sulfuric Acid, 50mL Measuring Cylinder, Two 100 mL beakers, Bunsen Burner, Tripod, Gauze mat, Funnel, Filter paper, Spatula, Evaporating basin, stirring rod. 

METHOD - 

1 - Add 20mL of sulfuric Acid to a 100mL beaker. Heat the acid until it reaches 70degrees, then turn off the bunsen burner. 

2 - Once heated, use a spatula to add pea-sized portions of copper oxide to the beaker. Stir the mixture for 30 seconds. 

3 - Repeat step 2 until no more will dissolve, then allow the beaker to cool. 

4 - Fold the filter paper and place it into the funnel. Place the filter funnel into the second beaker. 

5 - Make sure the beaker is cool enough to hold at the top. The contents should still be hot. 

6 - Gently swirl the contents of the beaker to mix, and then pour into the filter paper in the funnel. allow the liquid to filter through. 

7 - Rinse the beaker you used to heat the mixture previously, and place it back on top of your tripod filled with 50-60mL of water.

8 - Place the evaporating basin on top of the beaker and carefully pour some of the solutions from the beaker into the evaporating basin. 

9 - Gently heat the beaker until the solution in the evaporating basin has reduced by half. 

10 - Leave the evaporating basin to cool. Once cool, move the evaporating basin to a warm place where it will not be disturbed (i.e. a window sill) And observe over the next few days. Blue copper sulfate crystals should form. 

RESULTS -

CONCLUSION/OBSERVATIONS - 

Our crystals turned out better than the others as they formed in small shards of around 1cm made of small strands of crystal, this made them very fragile. They were a quite pale blue but it was still very visibly blue. I think that the reason ours turned out better than the others was because our bunsen burner was old and the flame would go out if we put it on full heat so we heated up our solution on a lower heat meaning our crystals grew slower but larger. 


Monday, 22 February 2021

Heating Zinc Oxide

Heating Zinc Oxide 

AIM - To See what change occurs when we heat zinc oxide with a bunsen burner. 

EQUIPMENT - 

1 - Bunsen burner 
2 - Gas 
3 - Heating mat 
4 - Lighter 
5 - Tripod 
6 - Safety Glasses 
7 - Crucible 
8 - Crucible holder 
9 - Zinc Oxide 

RESULTS - 

The zinc oxide started from a standard white powder color and as it was slowly heated from the bunsen burner the color transformed into an almost neon yellow/green colour.  When we turned off the heat to let the zinc oxide cool down it returned back to the original white colour. 

DISCUSSION - 

When we heat up the zinc oxide some of it loses oxygen, During this process, the electrons in the atoms move shells/ levels as a result of this the colour of the substance changes. Therefore the reason behind the zinc oxide changing colour is because of the electrons moving between shells. 


Image result for zinc oxide

Monday, 23 November 2020

Distillation!

Evaporation is the process of turning a liquid into a gas by adding heat. When you add heat to the liquid the kinetic energy in the heat makes the particles in the liquid move around faster causing the particles to move farther apart, turning the liquid into a gas. Condensation is the opposite of evaporation, it is the process of turning gas into a liquid by cooling the gas. This is something we can see on our windows as the warm air from inside touches the cold air from outside it creates little drops of water on your windows, this is condensation. 

AIM - To separate a solute from a solvent in a solution using distillation. 

EQUIPMENT - 

Coca-cola, Conical flask, Heatproof mat, a delivery tube and bung, Bunsen burner, Tripod, Gauze mat, Retort stand, Boss head and clamp, Boiling tube. 

METHOD - 

Step 1 - Set up the equipment as shown in the diagram below.
Step 2 - Add approximately 50ml of coke to your conical flask

Step 3 - Light your bunsen burner open the air hole and slowly push the bunsen burner under the tripod. 

Step 4 - Heat the solution until most of the solvent has been evaporated, then turn off your bunsen burner. 

HYPOTHESIS - 

Once the liquid part of coke (water) has been evaporated i think that there will be a sludgy mess left in the bottom of the conical flask, my guess is that this will be the flavoring for the coke and the sugar. 

RESULTS - 
As we turned the orange flame to blue the coke zero inside the conical flask heated up very quickly and was boiling in no time, along with the massive bubbles there was also lots of condensation gathering on the glass. attached to the conical flask was the tube thing wich slowly started pumping small amounts of clear liquid into the test tube that was dumped into a beaker full of ice. Coming out of the test tube was a ongoing stream of smoke. During the 20mins the coke zero slowly went down till there was barely any left, the colour was now almost black kinda like soy sauce but a shade darker. When all the water evaporated from the coke what was left was a small puddle of inky black. 

CONCLUSION -  

Monday, 9 November 2020

Serial Dilution!

 AIM - To do a serial dilution.

METHOD - 

1 - Grab 6 test tubes and fill 5 of them with 5ml of water, and 1 tube with 10ml 

2- Add-in potassium permanganate into the tube with 10ml of water. 

3- Move 5ml from test tube one (The one with the potassium permanganate)  into test tube 2 and so on until you get to the last test tube. 

MATERIALS- 

1 - 6 test tubes
2 - Test tube stand 
3 - 35ml of water 
4- Measuring tube 
5 - Dropper thingy 
6 - Potassium Permanganate 

HYPOTHESIS - 

My hypothesis is that the original color of the potassium permanganate (purple) will slowly dilute to almost no colour at all, I think that it will be mostly clear but will have a tint of purple that you can see clearly but isn't as strong as the original colour. 

RESULTS - 

The end result was like a gradient amongst the test tubes, test tube number one being the most concentrated because it had lots of potassium permanganate, and then test tube number  6 being the most diluted, it was almost a clear color with a hint of purple meaning it had hardly any potassium permanganate particles in the diluted solution and had more water particles. 


Monday, 2 November 2020

Mixing and Separating

For today's 2 hours of science, we are doing two in one experiment! We are going to make our own mixture then we are going to create a filter to filter the mixture we are creating.

KEYWORDS -  

solvent - The thing doing the dissolving (Liquid)
solute -  The thing being dissolved (Solid)
Solution - The mixture that has formed
filtration - Separates particles based on size
filtrate - liquid after it has been filtered
mixture - 2 or more substances together
solubility - ability to dissolve

AIM - 
To separate a solution from a precipitate (Precipitate is the name for a solid that forms in a liquid during a chemical reaction.)

MATERIALS - 

Copper sulfate
Sodium carbonate
Beaker
Funnel
Filter paper
Conical flask
Stirring Rod 

METHOD - 

1 - Add 50ml of sodium carbonate + copper sulfate into your beaker.

2- Mix the two liquids together with your stirring rod.

3- fold your filter paper into quarters and fold it out so it is in a funnel shape and slip it into the funnel. 

4 - Place your funnel and filter paper into the conical flask 

5- Pour in your mixture from the beaker and watch the magic happen! 

RESULTS - 

We added 50ml of each (Sodium Carbonate which was clear and colorless + copper sulfate still clear but had a twinge of light blue) They are both clear but when mixed together become an opaque blue. When the mixture was filtered the filtrate came out clear and colorless just like how the sodium carbonate had started off. What was left were the bigger particles that couldn't get through the filter paper and had become solid. The particles that remained on the top became a very gluggy texture that reminded me of glue, which was unlike the liquid filtrate. Though the remains on the top were really chunky, almost a slimy texture the filtrated mixture came out in a steady flow of drips that joined the transparent liquid down the bottom. The filtrate was the sodium carbonate and the blue solid was the copper sulfate.


Monday, 19 October 2020

Mixing + Dissolving

For today's 2 hours of science, we started looking at a new topic of mixing and dissolving! To get a better understanding of this topic we conducted an experiment. During the experiment, some keywords came up like "mixture" which is a substance made by combing either substance together, some examples of mixtures being, Tea + Coffee, Coke, Cake, Sand, Salad, etc. Another keyword that came up was dissolving which is what our experiment was based around. Dissolving is when a substance becomes part of a liquid, lots of things affect the rate that something dissolves for example when the water is hot the water particles move around faster which means that the particles collide more, compared to cold water that doesn't move as much making it take longer for particles to diffuse. But not everything dissolves and there are two special names, Soluble which is a substance that can dissolve in water, and Insoluble which is something that cannot dissolve in water. 

THE EXPERIMENT - 

AIM -  To find out what method makes sugar dissolve in water faster. 

EQUIPMENT - 
- Beaker 
- 100ml cold water 
- 100ml hot water 
- Sugar 
- Spatula 

METHOD - 

1 - Fill the beaker with 50ml of cold water x 2 / 50ml of hot water x 2 ( Do the experiment 4 times ) 

2 -  add one scapula of sugar 

3 - For the first time doing cold and hot water mix the sugar in the beaker

4- Time how long it takes for the sugar to dissolve in both the hot and cold water

5 - Complete the same thing but this time doesn't stir the sugar and see the time difference. 

RESULTS - 


CONCLUSION - 

In the end, the 2nd experiment dissolved the quickest as it had hot water which meant that the water particles moved around quicker due to the kinetic energy and the stirring helped the sugar dissolve quicker. Compared to the 4th experiment where it was cold water and no stirring, which ended up taking 2 minutes to dissolve. 

Monday, 7 September 2020

Particle Theory

During today's lessons in chemistry, we were learning about the matter! Under the topic of matter, we are casting an experiment on Particle Theory and diffusion. Particle theory is the theory that all matter is made up of heaps of very small particles,  All particles in a pure substance are the same, there is a space between all particles, particles are always moving, There are attractive forces between particles and Temeprature affects the speed at which particles move. Diffusion is where you are mixing different matter particles so it moves from a high concentration to a low concentration.

AIM - To investigate the effect of temperature on the rate of defusion.

HYPOTHESIS - I think that it will defuse faster in hot water rather than cold water, as hot water moves faster compared to cold water

METHOD - We filled the 2 Petri dishes with water, one with hot water, one with cold water. we then got two pinches of potassium permanganate and tipped them into the two dishes at the same time with the same amount of the potassium permanganate to see clear results.

CONCLUSION - The potassium permanganate spread faster in the warm water compared to the cold water telling us that the potassium permanganate diffused faster in hot water. 

DISCUSSION -
This was because the warm water particles were already moving fast due to the kinetic energy, and the potassium permanganate was already moving so when they met they were moving faster than the cold water, causing them to bump into each other quicker and making the potassium permanganate spread faster.

Wednesday, 24 June 2020

HEART DISSECTION!

Yesterday's lesson was an exciting one as we got to dissect a pig's heart! There are different parts of the heart that we have been researching about, The atrium which is the upper chamber of the heart that receives blood, The ventricles which are the bottom parts of the heart which pump the blood out of the heart, The Aorta is the largest artery and takes the blood away from the heart and around the body, The vena cava is a large vein that takes deoxygenated blood that has traveled all around the body to the heart, The valve's job is to stop the backflow of the blood, the valves are attached by the heartstrings wich help the valve's stop the backflow of the blood. To start the dissection we first cut open the right side of the heart which revealed the valves, heartstrings, Arteries, And veins! After that it was kinda a free for all, my group ended up tearing the pig's heart in half to get a better look at what was inside. Our materials only consisted of tweezers, Scalpel, and dissection scissors.  The heart is one of the most important organs in your body, its job is to pump the blood around your body and into your lungs to dispose of carbon dioxide and gather oxygen. Without a heart, we wouldn't be able to survive as we wouldn't get the energy and nutrients that we get from the blood that flows around our bodies. Overall this was really fun and interesting to understand how our own bodies survive!

Here are some photos of our class attempting to dissect a heart!


Wednesday, 17 June 2020

Arthritis!

Today while we were waiting to look at the joints in a cow and pig leg we skimmed over the topic of arthritis. For this task, we had to create a slide show explaining what arthritis is, how arthritis forms, and what different types of arthritis there are. Did you know that there are over 100 different forms of arthritis? I decided to complete this task with a classmate as I didn't have much time to complete this, but it was cool to see what their style is in creating a post! Here is my slideshow!


Wednesday, 3 June 2020

How does a hand function?

For the past two hours in hurumanu 2, we have been learning about the muscles in the body and how they work. We were also learning about how that hand functions. There is a total of 19 main bones in each of your hands. There are three in each of the fingers apart from the thumb which has 2 and then 5 bones in the palm of your hand that lead up to each of the fingers. The purpose of the bones in your fingers is to provide structure and support. Joints are where two bones meet, the purpose of a joint is to create flexibility and allow movement between bones. Ligaments are what attach the bones together and they allow restricted movement. Did you know that there are NO muscles in our fingers! there are only muscles in our forearm and palm. Tendons play an important role in the movement of your hand, they are the strings that attach muscle to bone. We have five long tendons that run from the tips of our fingers down to the muscles in our palm and forearm. The muscles that are attached to our phalanges by the tendons move our fingers by contracting and relaxing. As the muscle contracts, it pulls down on the tendon making your fingers curl down and bend. 

For our hands-on activity (pun intended) we created a paper version to further understand how our hands work. The materials used were 5 pieces of around 30cm thread, I piece of paper, a pen, 2 straws, scissors, a needle, and tape! To make the hand you first have to cut out the hand shape that you can either print out of trace (either is fine) After cutting out the hand you need to cut the straws into 3 small pieces for each of the fingers and two for the thumb, Then 3 long pieces to connect the fingers to the bottom of the main sheath, then cut 1 piece for the sheath. Then stick on all of the straw pieces on with tape and be careful not to squish the straws too much. Then take your five pieces of thread and tape the ends onto the back of the fingers and put the thread through the needle. Then take your needle and thread it through the straws on each of the fingers. After threading the string through each of the fingers there should be five pieces of thread sticking out from the bottom, if you have five then you are finished! Now if you pull on each of the strings you will find that the fingers curl inwards just like a real hand!

image.jpeg

Thursday, 7 November 2019

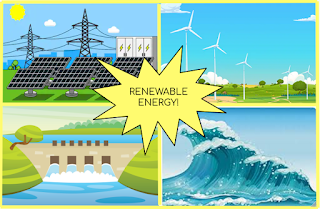
Renewable Energy

Aim: To make a presentation that investigates different renewable energy.
Section 1: Title Page

Section 2: Definitions
Hydro Energy
Hydro Energy is created when water rushes through the dam and pushes a turbine which creates electricity. 
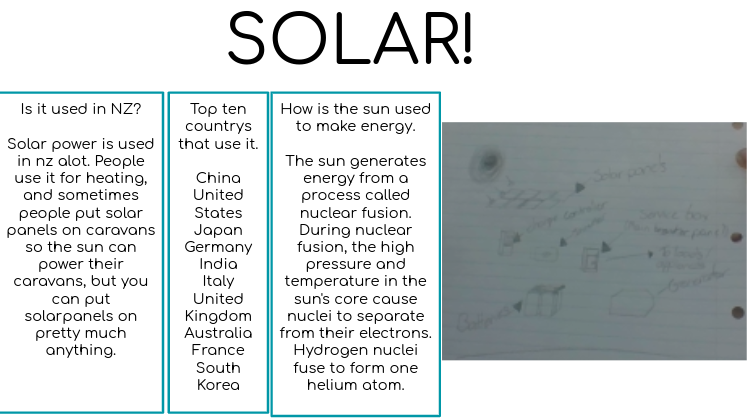
Solar Energy
Solar energy is created from light and heat from the sun which is harnessed by a solar panel or other objects. 
Wind Energy 
Wind energy is the use of wind to provide mechanical power through turbines to turn electric generators which creates energy.

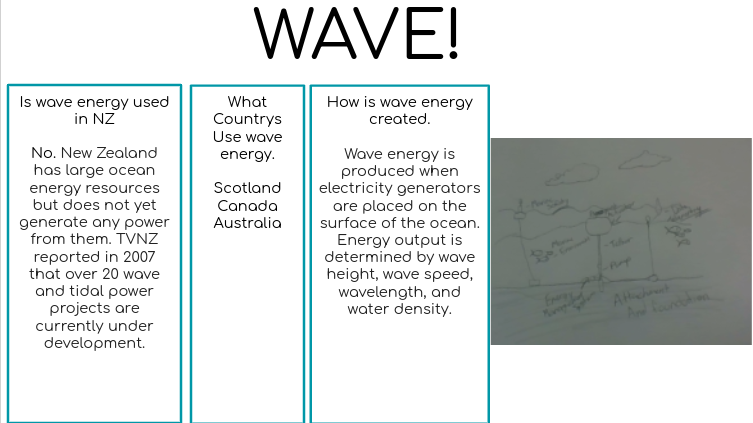
Wave Energy
Wave energy is created when people harness the current of the waves to create energy. 

Section 3; Investigate each of the 4 Energy types.
(Hydro, Solar, Wind, Wave ) 

Hydro- 

Wind- 

Solar-

Wave-


Section 4: Renewable Energy in the future.

List 10 ways that renewable energy will be used in the future to replace our current activities.

Electric Cars
Electric Heating 
Using renewable energy for trains
Electric public transport 
Electronic machines (Robots, production machines) 
Electronic Machines (diggers, etc) 
Renewable energy Factories 
Renewable energy household items (ovens, fridges, etc) 
Renewable energy light bulbs 
Renewable energy outlets (Powers phones, computers, etc)


Thursday, 24 October 2019

SOLAR POWERED OVENS!

Hurumanu - Renewable Energy

Aim: To make a solar-powered oven.

Materials: 

  1. Tinfoil   
  2.   Pizza Box 
  3.   Black rubbish bag   
  4.   Scissors 
  5. GladWrap   
  6.  Stick 
  7. pen 
  8. Food 
  9. ruler
  10. Newspaper
Steps:
  1.   Fold the pizza box into o box 
  2.  Cut out a box from the top of the pizza box 5cm from the edges besides the fold. 
  3.   Put the back rubbish bag in the bottom of the inside and up the sides. 
  4.   Sellotape the tinfoil into the inside of the square you cut out. 
  5.   Cover the whole that you made with GladWrap 
  6.   Put your food inside then line your box up with the sun and watch your meal cook.
Findings:


Time-
Temperature-
0

15

30

45


Conclusion


Wednesday, 16 October 2019

My Carbon Footprint


You are now going to look at your own carbon footprint by taking a questionnaire. Remember to 'Add details to improve accuracy'.

Based on the questionnaire what is your:

1. Ecological Footprint
2. Carbon Footprint

How many planets did you have?

2.9 Earths 


What is your personal Earth overshoot day?

06th of May

ENERGY SAVING TIPS FILM


Name 2 of the tips.

  1.  Turn of the lights in rooms that you're not in. 
  2.  When going on holiday unplug all of your devices.
  3. Use public transport to reduce the amount of CO2 being released into the air. 
  4. Use stairs instead of elevators to save electricity. 
  5. Put lids on pots to maximize the amount of gas you're using to heat up your meal.

Video questions:

What has human activity done to our planet?
Polluted it. 
What is Zero Waste?
Definition: Recycling, Reuse, Recycle, Trying to stop huge landfills from releasing methane into the air.

What stuff has a carbon footprint?
Most things in your everyday life 
toothbrush, chair, clothes, etc  

What are 2 easy things to help our planet?
  1.  Put food products into our compost.
  2.    Recycle all your used items. 
What do we need to recycle?


What does recycling do to our planet?


How much of our rubbish is made up of food scraps?


What does methane gas do to our planet?


What does soil do to carbon dioxide in the atmosphere?
it sucks up 2x the carbon dioxide than trees do. 
What do using zero waste practices do to our planet?

MY INVESTIGATION.


Image result for rates of decomposition


  • Choose 3 items from the list.
  • Investigate them using Google.
  • Answer the 4 questions below.


Name: 
  1. How long does this resource take to decompose?
  2. What resource/fossil fuel are they made from?
  3. How does making this object contribute to climate change?
  4. How is this resource recycled?


Thursday, 26 September 2019

My Investigation On Climate Change

ACIDIFICATION

DEFINITION: Acidification is the ongoing decrease in Ph levels in liquids. 

What is happening to the oceans?
  • The Earths oceans are acidifying caused by the uptake of Carbon Dioxide from the atmosphere
  •  The oceans Are slowly rising because of Global Warming and bodies of ice are melting. 
  • The ocean sucks up some of the earth's heat, and because of carbon dioxide trapping in heat from the sun, the oceans can get up to very high temperatures. 
What does this do to shellfish?
  • Shellfish need Calcium to make their shells, and when the oceans PH levels get too low they struggle to make their shells which can sometimes lead to the death of hundreds of shellfish. 

HOW DOES CLIMATE CHANGE CONTRIBUTE TO THE ACIDIFICATION OF OUR OCEANS?

We produce a lot of carbon dioxide and all that carbon dioxide gets released into the air. It then enters the water cycle and the carbon dioxide ends up in the ocean. This is making the oceans  PH levels drop dramatically which is affecting lots of sea life and making the ocean very acidic. 

2 Images;
Image result for broken shellfish shells     Image result for Acidic oceans


DEFINITION: When people cut down trees to clear space to build homes or to use the trees for human comfort 

What are trees used for?
Paper, Furniture, Houses, Buildings, 

HOW DOES DEFORESTATION AFFECT THE CLIMATE?

If people cut down trees there won't be trees to suck up the carbon dioxide which traps carbon dioxide in the atmosphere which helps cause global warming.

2 Images;
Image result for deforestation Image result for deforestation


ICECAP MELT

DEFINITION: when global warming is making ice all around the world melt.

If all the ice melted what would happen?
All the fresh water in the ice would go into the salty seas and All aquatic life that is used to living in salt water would die. This also means that the sea levels would rise and 2 billion people would have to relocate. 

HOW DOES ICECAP MELT AFFECT CLIMATE CHANGE?

If the sea levels rise then they would have to relocate a new location and with less land above sea level people would cut down more forest so they have more space to build houses. That means that there are not as many trees to suck up the carbon dioxide wich is going to make the planet hotter and hotter. 


2 Images;
Image result for sea turtle
Image result for ice caps melting   

WATER VAPOUR

DEFINITION: Plants and bodies of water release water vapor into the air, which creates clouds. 

HOW DOES  WATER VAPOUR AND EVAPORATION CONTRIBUTE TO CLIMATE CHANGE? 


2 Images;

Image result for water vapor    Image result for water vapor