Monday 7 December 2020
No More Plastic Bags!
For our main project, this semester is to create a bag to replace plastic bags, which is hurting the environment. During this project, we got to choose and design what kind of bag we were going to make. We started the semester off by creating different types of bags so that we could choose what we found more intriguing to create and the end result came out very functional as a bag! I choose to create a simple tote bag as it would be quick to make but it is also practical, this would also leave me with enough time to do my documentation. When I started this project I was hoping to be able to create two bags, one I would donate to an organisation called family works, and the other I would make for myself to use. Unfortunately, I ran out of time to make my own bag, the messenger bag, and do the documentation for the bags so I decided that for the last few weeks of school o was going to focus on doing the documentation. Overall im still happy with how much I accomplished and I think that my work that I did have the time to do turned out excellent.
Monday 30 November 2020
Rats and Fleas
RATS + FLEAS

SPREAD DIAGRAM
BASIC BODY PARAGRAPH -
During the pandemic, ‘The black death’ over 2 thirds of the population were killed by the plague. But what spread the plague and where did it come from? This is where rats and fleas come in as they were how The Black Death became so deadly. There were multiple ways of catching the plague but the most common was catching it from direct contact with a person who is infected with the plague. But for that person to become ill in the first place, they would have caught it off of fleas, fleas would bite the rats suck out their blood which is carrying the plague then jump onto a human and barf it all up into the person’s bloodstream. Infected people would then spread the plague through trading ports and the plague soon spread all throughout Europe. It started when 12 ships from the Black Sea docked at the Sicilian port of Messina within 3 years there was no place safe from the black plague. If a plague like the black death were to come about nowadays it would be less infectious as we have better hygiene rather than people living in the 13th century. During the 13th-century people would throw their droppings onto the streets this attracted rats who loved the dirt and grime, this caused there to millions of rats making the plague spread like wildfire. The more rats, the more fleas, the more rats and fleas the more people got infected, the more people got infected the more it would spread and the more people would die from this tragic pandemic.
Evaporation Experiment
We have tried filtering to get a solid out of a liquid but this time we can't see the solid because it is dissolved in the liquid. If we heat up the solution then the solvent will evaporate off and we will be left with the solute.
AIM - To use evaporation to separate a solution into a solvent and solute.
HYPOTHESIS - I think that the water will evaporate and that the copper sulfate will be left in the bottom of the beaker in a cluggy state.
EQUIPMENT -
Copper sulfate solution, 250mL Beaker, heatproof mat, evaporating basin, element.
METHOD -
1. Set up element
2. Add 100mL of hot water to the beaker and place it on the element.
3. Add copper sulfate to the evaporating basin until it is quarter full.
4. Carefully, place the evaporating basin on top of the beaker.
5. Turn on the element to 3
6. Heat the solution until most of the solvent has been evaporated and crystals of solute are forming.
7. Turn off the element- be careful not to touch, as it will be hot for a long time.
COPPER SULFATE SOLUTION -
Solvent - Water
Solute - Copper sulfate
Friday 27 November 2020
Cannabis!
A few weeks ago we started a new topic in health, this was the discovery topic. For this topic, we got to choose what the topic was going to be. I decided on cannabis as I thought it was fitting as I started back when there was a referendum on legalizing cannabis. We started off by creating 5 big questions that we were going to answer in this presentation, my five big questions being, What is cannabis? Why would people be for/against cannabis?, What are the positive and negative outcomes of cannabis? who does cannabis affect? How do we minimize harm? What are the short and long-term effects of cannabis? Afterward, we gather some information so that I could answer the questions properly. Next was the fun part where we got to choose how we presented our learning, for this I decided to make a site using carrd. Altogether this was a really fun task and I learned a lot about cannabis and the health risks that may occur.

(PHOTO LINK)
Thursday 26 November 2020
Water Safety!
Next week we are going on 3 exciting eotc days to celebrate the end of the year and the hard work we have put in. Over the three days, we will be going to Jellie Park, Adrenalin Forest, Christchurch city. To be prepared for these fun days we are doing a task around that specific place, I choose to do a task around jellie park. Jellie Park is an awesome place but it can also be dangerous, that is why I created a poster with rules around water safety!

Monday 23 November 2020
Distillation!
Evaporation is the process of turning a liquid into a gas by adding heat. When you add heat to the liquid the kinetic energy in the heat makes the particles in the liquid move around faster causing the particles to move farther apart, turning the liquid into a gas. Condensation is the opposite of evaporation, it is the process of turning gas into a liquid by cooling the gas. This is something we can see on our windows as the warm air from inside touches the cold air from outside it creates little drops of water on your windows, this is condensation.

AIM - To separate a solute from a solvent in a solution using distillation.
EQUIPMENT -
Coca-cola, Conical flask, Heatproof mat, a delivery tube and bung, Bunsen burner, Tripod, Gauze mat, Retort stand, Boss head and clamp, Boiling tube.
METHOD -
Step 1 - Set up the equipment as shown in the diagram below.
Step 2 - Add approximately 50ml of coke to your conical flask
Step 3 - Light your bunsen burner open the air hole and slowly push the bunsen burner under the tripod.
Step 4 - Heat the solution until most of the solvent has been evaporated, then turn off your bunsen burner.
HYPOTHESIS -
Once the liquid part of coke (water) has been evaporated i think that there will be a sludgy mess left in the bottom of the conical flask, my guess is that this will be the flavoring for the coke and the sugar.
RESULTS -
As we turned the orange flame to blue the coke zero inside the conical flask heated up very quickly and was boiling in no time, along with the massive bubbles there was also lots of condensation gathering on the glass. attached to the conical flask was the tube thing wich slowly started pumping small amounts of clear liquid into the test tube that was dumped into a beaker full of ice. Coming out of the test tube was a ongoing stream of smoke. During the 20mins the coke zero slowly went down till there was barely any left, the colour was now almost black kinda like soy sauce but a shade darker. When all the water evaporated from the coke what was left was a small puddle of inky black.
CONCLUSION -
Monday 9 November 2020
Serial Dilution!
AIM - To do a serial dilution.
METHOD -
1 - Grab 6 test tubes and fill 5 of them with 5ml of water, and 1 tube with 10ml
2- Add-in potassium permanganate into the tube with 10ml of water.
3- Move 5ml from test tube one (The one with the potassium permanganate) into test tube 2 and so on until you get to the last test tube.
MATERIALS-
1 - 6 test tubes
2 - Test tube stand
3 - 35ml of water
4- Measuring tube
5 - Dropper thingy
6 - Potassium Permanganate
HYPOTHESIS -
My hypothesis is that the original color of the potassium permanganate (purple) will slowly dilute to almost no colour at all, I think that it will be mostly clear but will have a tint of purple that you can see clearly but isn't as strong as the original colour.
RESULTS -
The end result was like a gradient amongst the test tubes, test tube number one being the most concentrated because it had lots of potassium permanganate, and then test tube number 6 being the most diluted, it was almost a clear color with a hint of purple meaning it had hardly any potassium permanganate particles in the diluted solution and had more water particles.

Monday 2 November 2020
Mixing and Separating
For today's 2 hours of science, we are doing two in one experiment! We are going to make our own mixture then we are going to create a filter to filter the mixture we are creating.
KEYWORDS -
solvent - The thing doing the dissolving (Liquid)
solute - The thing being dissolved (Solid)
Solution - The mixture that has formed
filtration - Separates particles based on size
filtrate - liquid after it has been filtered
mixture - 2 or more substances together
solubility - ability to dissolve
AIM -
To separate a solution from a precipitate (Precipitate is the name for a solid that forms in a liquid during a chemical reaction.)
MATERIALS -
Copper sulfate
Sodium carbonate
Beaker
Funnel
Filter paper
Conical flask
Stirring Rod
METHOD -
1 - Add 50ml of sodium carbonate + copper sulfate into your beaker.
2- Mix the two liquids together with your stirring rod.
3- fold your filter paper into quarters and fold it out so it is in a funnel shape and slip it into the funnel.
4 - Place your funnel and filter paper into the conical flask
5- Pour in your mixture from the beaker and watch the magic happen!
RESULTS -
We added 50ml of each (Sodium Carbonate which was clear and colorless + copper sulfate still clear but had a twinge of light blue) They are both clear but when mixed together become an opaque blue. When the mixture was filtered the filtrate came out clear and colorless just like how the sodium carbonate had started off. What was left were the bigger particles that couldn't get through the filter paper and had become solid. The particles that remained on the top became a very gluggy texture that reminded me of glue, which was unlike the liquid filtrate. Though the remains on the top were really chunky, almost a slimy texture the filtrated mixture came out in a steady flow of drips that joined the transparent liquid down the bottom. The filtrate was the sodium carbonate and the blue solid was the copper sulfate.
Thursday 29 October 2020
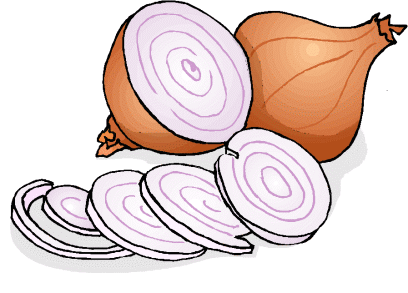
Open Steak Burgers
In our home economics class, we were making open steak burgers! This was a pretty quick lesson as the only thing that took a long time to prepare was the steak. In the end, the steak was a tiny bit overcooked and it needed more flavour but my group didn't want anything interesting in their burgers so the burger was over plain, but the sauce helped. Even though our dish wasn't the most delicious dish I've ever had it was still fun to make!
INGREDIENTS -
steak
1 Tablespoon Oil - optional
Tomatoes - optional
An Onion- optional
1 Leaf of Lettuce - optional
Cheese - optional
Beetroot - optional
Sauce:
BBQ
Tomato
Mayonnaise
- optional
METHOD -
1. Collect your chosen ingredients.
2. Steak - Cut into thin strips and add into a pan with 1 tablespoon oil.
3. Prep your ingredients to put on your burger.
4. once your steak is done then add your ingredients onto the buns.
5. Enjoy your burgers!
Rice paper spring rolls
During today's lesson, in our home economics class, we were given a full demonstration on how to make rice paper spring rolls by our teacher Mrs. Rhodes followed by the class trying to replicate the process of making the rolls. This was excitingly fun as it was something me and my classmates had never made before. It was surprisingly not as easy as it sounds as the rice paper was very delicate and would either snap or tear when dunking the paper into the cold water. The whole meal was overall delicious and is a fun snack I would definitely recommend although rice paper was soggy and had no flavour, the vegetables gave a nice crunchy texture to the rolls and the sauce, in my opinion, made the dish as it gave a sweet yet spicy flavour that really went with the rice paper and the vegetables.
Nutrients/Ingredients:
Vermicelli - Carbs, Copper, Fiber, Zinc, Calories, Calcium, Iron, and Magnesium.
Carrots - potassium, vitamin A, K1, B6.
Capsicum - Vitamin A and C, Dietray Fibre, Vitamin E, B6 .
Cucumber - Vitamin K, Vitamin B and C, Copper, , Potassium, and Magnesium.
Lettuce - Vitamin B, Vitamin K, Vitamin A, Vitamin C, Potassium, Calcium, and Iron.
Bean Sprouts - Vitamin A, Vitamin C, Calcium, Iron, Magnesium, Calories, Protein, Carbohydrates, Fiber, Potassium, and Sugar.
Cooking Method:
1. Place all the ingredients into separate bowls.
2. Half fill a shallow dish with cold water. The dish needs to be big enough to fit the rice paper sheets.
3. Dip the rice paper sheets into the cold water and lay them out on a chopping board and let them soften.
4. Place your fillings in the centre of the softened sheets.
5. Fold the two sides of the rice paper sheet towards the middle.
6. Roll carefully into a cylinder shape. Repeat for the other sheets.
7. Serve immediately or refrigerate until ready to serve.
Important to remember:
Rice paper sheets are very delicate so be gentle when dipping them in the water.
Use predominantly vegetables and soft herbs as fillings.
Try to use a combination of ingredients that balance flavor, texture, and nutrients.
Monday 19 October 2020
Mixing + Dissolving
For today's 2 hours of science, we started looking at a new topic of mixing and dissolving! To get a better understanding of this topic we conducted an experiment. During the experiment, some keywords came up like "mixture" which is a substance made by combing either substance together, some examples of mixtures being, Tea + Coffee, Coke, Cake, Sand, Salad, etc. Another keyword that came up was dissolving which is what our experiment was based around. Dissolving is when a substance becomes part of a liquid, lots of things affect the rate that something dissolves for example when the water is hot the water particles move around faster which means that the particles collide more, compared to cold water that doesn't move as much making it take longer for particles to diffuse. But not everything dissolves and there are two special names, Soluble which is a substance that can dissolve in water, and Insoluble which is something that cannot dissolve in water.
THE EXPERIMENT -
AIM - To find out what method makes sugar dissolve in water faster.
EQUIPMENT -
- Beaker
- 100ml cold water
- 100ml hot water
- Sugar
- Spatula
METHOD -
1 - Fill the beaker with 50ml of cold water x 2 / 50ml of hot water x 2 ( Do the experiment 4 times )
2 - add one scapula of sugar
3 - For the first time doing cold and hot water mix the sugar in the beaker
4- Time how long it takes for the sugar to dissolve in both the hot and cold water
5 - Complete the same thing but this time doesn't stir the sugar and see the time difference.
RESULTS -

CONCLUSION -
In the end, the 2nd experiment dissolved the quickest as it had hot water which meant that the water particles moved around quicker due to the kinetic energy and the stirring helped the sugar dissolve quicker. Compared to the 4th experiment where it was cold water and no stirring, which ended up taking 2 minutes to dissolve.
Friday 16 October 2020
Masky Mask Mask
BASEL MASKS -
These are the masks that we were lucky enough to be able to use during our class.
What are basel Masks?
Basel Painted a traditional white, the Basel masks are made of light, long-lasting neoprene. Developed as theatrical tools by legendary mask and movement innovator, Jacques Lecoq, Basel, and Larval Masks are excellent for teaching theatrical projection and timing.
COMMADIA MASKS -

What are Commedia masks?
Commedia dell'arte masks are one of the most integral aspects of each stock character. Each mask design is paired with a specific character based on its appearance and tradition. Masks were originally all made of leather, but now more commonly made of neoprene.
GREEK MASKS -

What are Greek Masks?
The masks were most likely made out of lightweight, organic materials like stiffened linen, leather, wood, or cork, with the wig consisting of human or animal hair. ... Greek mask-maker, Thanos Vovolis, suggests that the mask serves as a resonator for the head, thus enhancing vocal acoustics and altering its quality.
MASQUERADE MASKS -

What are masquerade masks?
Masquerade masks had many uses including hiding one's identity and using a different color to express one's freedom of speech and voice one's emotions and opinions without judgment. There were two types of base masquerade masks; black masks and white masks.
Making Our own masks!
It sounds pretty simple but this activity took more time than the performance. I and my group were focusing our masks off of the emotions happy, sad, angry, and scared. My mask was based on happy which I thought was the hardest one to do as I couldn't use the paper template as it already had a blank face carved out, and that wouldn't do so I cut my own out of cardboard and made different eyes and mouth. This was a very good decision as I thought my mask turned out excellent! To finish it all off I added some details like freckles and outlines everything in yellow to make it look happier!

Creating a performance!
This in my opinion was the best part! and my group gathered backstage and decided on an uplifting song and what better music than carnival music! After we all agreed on a song (it took a lot longer than it should have) we choose our setting but in the end, it didn't really show the setting but that didn't matter because it was more focused on our performance and how we held our bodies to show the emotions that we were trying to present. Over I think my group did well but could have been better if we had more time, so it was a really really short performance but it was still really really fun!
Thursday 15 October 2020
9/11
In today's lesson in social studies we were working on our individual tasks, I did mine on 9/11 and created a timeline of the chaotic events that occurred on that tragic day. This was very interesting to research as i had never gone into depth about what happened and how the world responded to the event. Here is my timeline!

Tuesday 22 September 2020
Making Mini Apple Sauce Muffins!
For this practical lesson we were doing the usual but with a twist! We were going to make apple sauce muffins but each kitchen had a different substitute ingredient for example my group had soy milk instead of regular milk and had canola oil instead of butter. After successfully making our mini muffins we rotated around the kitchens and tasted all the mini muffins. Because this took longer than expected to make and we still needed to taste the muffins we had to sadly take out the muffins early so they were pretty much all under cooked. Next time I would leave them in for longer and add more cinnamon as flavour was serious lacking in the muffins.
Group 1 : Original Muffins
Group 2 : Butter & Wholemeal flour
Group 3 : Canola & Wholemeal flour
Group 4 : Butter & Soy
My group : Soy & Canola
Ingredients:
1 c Apple sauce
2 T Butter, melted & slightly cooled, or canola, a neutral oil
1 Egg, lightly beaten
1/2 c milk or soy milk
1 t vanilla essence
1 c wholemeal flour or white flour
1/2 c rolled oats
1/4 c sugar
1 t baking powder
1/2 t baking soda
1 t cinnamon
Cooking Method:
1. Preheat oven to 180°C and grease mini muffin tins or line with paper cases.
2. In a small bowl, use a fork to whisk together the apple sauce, melted butter, milk, egg and vanilla (liquid ingredients)
3. Add liquid ingredients to the flour, oats, baking powder, baking soda, cinnamon and sugar - gently fold together.
4. Fill the muffin tins / paper cases (mini ones) to 3/4 full.
5. Bake about 10 minutes or until cooked.
6. Remove from oven. Let cool for 2 minutes before removing from muffin tins.
Here are some photos of the cooking process and the finished result:
Hope you enjoy.
Spag bol - Cooking
In today's practical cooking class, we were making spaghetti bolognese. While making this my group worked excellently and we got to eat our meal and get out of class on time! The end result was delicious but I think that the pasta could have been cooked for longer as it was still kinda hard when we bit into it, otherwise it was delicious and we had the right amount of sauces to complement the seasoning on the meat.
Ingredients:
- Olive Oil
- Onion
- Garlic
- Carrots
- Celery
- Mince
- Basil
- Can of tomatoes
- Tomato puree
- Spaghetti Sticks
Cooking Method:
1. Heat the oil in a large pot and add the onion and garlic.
2. Cook for 2-3 minutes, stir frequently until onion is soft.
3. Stir in carrots a celery and cook for another minute.
4. Add mince, stirring until the beef has lost its pink colour.
5. Add basil, tomatoes and tomato puree.
6. Bring mixture to boil then reduce the heat to a gentle simmer and cover for 10-15 minutes.
7. Boil water and then add spaghetti sticks to cook for 10-12 minutes.
8. Drain spaghetti and toss with a little olive oil to avoid sticking.
9. Then arrange your plates dividing the mixture up evenly.
10. Serve and enjoy
.
Monday 21 September 2020
Expansion and contraction
Today in chemistry class we were looking at four different actions to do with matter, Expansion, contraction, Convection, and conduction, We then had to choose one of them and create an animation explaining what the action is. I partnered up with my mate and we did animation on expansion and contraction.
Friday 18 September 2020
Making My Own Melodrama Character!
Introducing..... Priscilla the Poor!!!
Full name- Pricilla Eveningtide
Parents - Mother (Deceased) Maria Eveningtide Father, Harold Eveningtide
Siblings - older sister, Babra Eveningtide
Age - 15
Gender- Female
Backstory -
She and her sister grew up alone as their father was a useless drunk and never came home. They were only 7 and 5 and they were on the streets fending for each other. As bad is it was it got worse for Priscilla when their father came home after 2years of the kids not seeing them, he had run out of money and now that Priscilla's older sister Babra Eveningtide had turned 13 he sold her, took the money, and ran. Priscilla was left on her own. It's said that the two sisters grew distant for awhile the only thing keeping them together was their hate for the world. After Priscilla had spent her whole life growing up with her older, she became her role model. And it was no surprise that when their older sister turned evil, Pricilla followed in her footsteps.
Occupation -
Pricilla is undercover as a maid working for the hero of the story but is a spy for the villain who is her older sister (But its a secret so no one knows that they are siblings)
Skills -
She is very intelligent, good under pressure, calm and collected, And an AMAZING liar. She also has a big influence on the hero as the hero doesn't know what he's doing.
Weaknesses -
She has a growing fear of her father, specifically her father trying to sell her.
Best friend -
Scarlet Evergreen, Also works for the villain but is a bit thick and is usually drinking.
Interests - Making the villain (her older sister) proud, Making the world pay for the way they treated her and her sister when she was young.
Thursday 17 September 2020
The Valdivia Earthquake!
During today's chaos lesson we were looking at tsunamis and were trying to get the movie "The impossible" to work but after failing multiple times we retreated back to the independent tasks matrix. I and my partner decided to work on the Earthquake section. For the section, we choose one of the biggest earthquakes recorded, the Valdivia earthquake, and made a poster on the destruction of the earthquake. Here is my poster.


Monday 14 September 2020
Chicken Stir fry
Today's practical lesson we were making chicken stir-fry. My team worked really well for this practical and we got the dish made surprisingly quickly. The end result was delicious and it had a very strong salty flavor. Altogether it was a really fun practical and next time I would go sparingly on the sauces.
CHICKEN STIR FRY -
2 pieces of chicken
2 tablespoons of soy sauce
2 tablespoons of honey
2 tablespoons sesame sauce
Any vegetable
2-minute noodles
Cut the chicken into bite-sized pieces.
Saute the onions.
Add the chicken and cook until lightly browned
Add the vegetables and sauce.
cook for 5-6 minutes or until vegetables is cooked.
Friday 11 September 2020
Potato Fritters!
For this weeks practical lesson we made potato fritters! During this lesson i was put in a different team so i wasn't used to working with the team i was in, and there wasn't much communication between our leader and the rest of the team. In the end we got the meal finished but i had to leave early so i didn't get to taste what we had cooked, but from what i heard from my team it was delicious even though the eggs ended up in a more scrambled state. Overall this wasn't my favourite practical lesson but it was still a lot of fun.


Apple Crumble - Cooking
For this week's practical lesson we made apple crumble! During this lesson, I and one of my teammates decided to share the role of leader and split the recipe into 3 parts, Making the crumble, cutting the apple, and then splitting the mixture into four even proportions and cooking them in the oven. The ingredients used in this dish were 1/2 cup of flour, 1/2 a tsp of cinnamon, 1/2 cup of brown sugar, 75g of cold butter, 3/4 of rolled oats, 2-3 medium sized apples, 1 dessert spoon of white sugar, and 1 Tbsp of water. The end result was delicious! Although the apples could have been better if they had stayed in the oven for longer, but we were on a time crunch so we decided to take the dishes out. Overall my team worked really well and the food was awesome and we were out of class on time, although it ended up very sweet so if i were to make this next time i would leave out the extra white sugar in the ingredients.

Making Nachos!!
Today was a practical day in cooking class! This lesson we were making vegetarian nachos. Our ingredients consisted of 2-4 nachos, 1 grated carrot, half an onion, 1/2 can of chili beans, 1/2 a can of tomatoes, a handful of nacho chips, a sprinkle of cheese, and sour cream /optional. The food was delicious and had the right amount of spice to it, and the corn chips added a cool texture to the mixture. Overall our team worked really well and got our food finished and had our kitchen cleaned quickly!
Monday 7 September 2020
Particle Theory
During today's lessons in chemistry, we were learning about the matter! Under the topic of matter, we are casting an experiment on Particle Theory and diffusion. Particle theory is the theory that all matter is made up of heaps of very small particles, All particles in a pure substance are the same, there is a space between all particles, particles are always moving, There are attractive forces between particles and Temeprature affects the speed at which particles move. Diffusion is where you are mixing different matter particles so it moves from a high concentration to a low concentration.
AIM - To investigate the effect of temperature on the rate of defusion.
HYPOTHESIS - I think that it will defuse faster in hot water rather than cold water, as hot water moves faster compared to cold water
METHOD - We filled the 2 Petri dishes with water, one with hot water, one with cold water. we then got two pinches of potassium permanganate and tipped them into the two dishes at the same time with the same amount of the potassium permanganate to see clear results.
CONCLUSION - The potassium permanganate spread faster in the warm water compared to the cold water telling us that the potassium permanganate diffused faster in hot water.
DISCUSSION -
This was because the warm water particles were already moving fast due to the kinetic energy, and the potassium permanganate was already moving so when they met they were moving faster than the cold water, causing them to bump into each other quicker and making the potassium permanganate spread faster.
Friday 21 August 2020
Melodramatic Acting Style
The Melodramatic Acting Style
Remember in Victorian Melodrama, all emotion is externalized. There is no such thing as inner psychological depth!
Generally, this means “Over the Top” in every way. Here are some techniques which help create this effect
Remember in Victorian Melodrama, all emotion is externalized. There is no such thing as inner psychological depth!
Generally, this means “Over the Top” in every way. Here are some techniques which help create this effect
- Slower, clearer delivery of lines with huge projection. Remember Victorian Theatres were huge and there were no microphones.
- Play everything to the audience, even if you are supposed to be talking to another character on stage!
- Indicate whom you are talking to by looking sideways at them and holding your hand out towards.
- Address the audience directly whenever the script will allow you to do so.
- The Pose: Invent poses of shock, horror, love, evil, intent, cruelty, desire, dilemma, forgiveness, begging forgiveness, etc. A pose should last at least three seconds and should be clearly visible from fifty meters.
- The working yourself up to the pose: lasts two to three seconds --let's see you get there!
- The Gasp - very loud expressing a range of emotions. Often accompanied by a pose.
- The Swoon - often preceded by lines such as "Alas! I can hardly bear it." The swoon should be graceful and provision should be made for someone to catch you.
- The long walk downstage/upstage/across the stage when hatching a plan or in a dilemma.
- The Pacing- to and fro across the stage when hatching a plan or in a dilemma. Move before you speak so that the audience can track who is speaking.
- The Tableau (freeze frame)- the still picture made up of a number of characters to freeze the moment, eg: The Happy Ending/ The Secret Lovers. The tableaux should be very explicit.
- The Sigh/The Groan/The Tubercular Cough
- First Entrances are important - may even bow, this is related to the cult of “The Actor” – the Star system.
Thursday 20 August 2020
Making a sustainability Board game.
The final part of the RIP Assignment was a sustainability project that draws in our personal skills and interests. For this task, I chose to partner up with a mate and create a board game on tinkercad on the topic of Deforestation. As I was making a board game I took inspiration from the well-known games monopoly and the game of life. I decided to make the game simple without overcomplicating the rules, but I still wanted it to be original. As my partner was away for the first few days I didn't want to start creating the rules or the purpose of the game, so instead, I created the board that you play on. After my partner decided to show up we started getting into the final details of the game as in the rules and the cards that you pick up. This honestly didn't take as long as I thought it would, after we got the rules down it was full steam ahead, and we got it done after just a few lessons. If I were to do this again I would start off by writing the rules as it was much simpler when we knew what we were doing.
Friday 14 August 2020
What is Melodrama?
In drama, we are focusing on Melodrama! The question we have to answer is "What is victorian melodrama?" Melodramas are victorian dramas where music is added to an action to exaggerate the emotion during the scene. Melodramas feature stock characters which are usually, the villain, hero, heroine, sidekick, and overbearing parent. The Melodramatic acting style includes Slow, clear delivery of lines with a huge projection as victorian theatres were huge and there were no microphones. The acting style also consists of the actors always playing to the audience even if they are supposed to be talking to one another. With melodrama comes huge dramatic gestures one of the most commonly known ones being the "gasp" and the "Swoon" The gasp should be very loud, expressing a range of emotions and often accompanied by a pose. Whereas the swoon is often preceded by the lines such as "Alas! I can hardly bear it." The swoon should be graceful and there should probably be someone ready to catch you!

Monday 10 August 2020
The Javan Rhinoceros Investigation.
The next part of my sustainability assignments consisted of creating an investigation about a sustainability topic that draws in our mathematics skills that we have gathered over the course of this hurumanu. For my investigation, I wanted to focus on Critically endangered species, so I chose the Javan rhino. The purpose of my investigation was to answer my question "How do we know if what we are doing to protect rhinos is effective?" To do this I had to look into what was being done to save the Javan rhino but also the status of the Javan rhino population over 50 years. The answer to my question was Yes, it is effective. Even though the population has only increased by around 50 from 1965 to 2020 it is a big step to getting a stable number of Javan rhino. To include some mathematics skills we had to create a graph of our findings from the investigation, I presented my results through a line graph as I thought it was most effective for showing the growth in population. To present my investigation work I decided to keep it simple and do it on google slides. This investigation was very inspiring as I never realized how critically endangered this species was and what is being done about this issue.
Friday 7 August 2020
Tuesday 4 August 2020

Friday 31 July 2020
Making Pita pockets!
Ingredients that we used -
Carrots -

Onions -
Pita pockets -
Cheese -

Ham -


Lettuce -

Subscribe to:
Posts (Atom)